Day 4: Building a Smart Contact Page with Slack Webhooks
Building a Smart Contact Page with Slack Webhooks
📢 If you haven't read the previous parts of our 7 Days Website Revamp series, check out Day 1, Day 2, and Day 3!
📚 You can also explore all posts from the 7 Days Website Revamp series!
Why We Chose Slack Webhooks Instead of Email
In the early stages, our contact form was set up to send inquiries via email. However, managing email servers, SMTP configurations, and deliverability introduced unnecessary complexity.
Instead, we decided to:
- Keep things lightweight and fast
- Get real-time notifications in our Slack workspace
- Skip dealing with email spam, SMTP errors, and mail server maintenance
Designing the Contact Page
We built our Contact page with a focus on simplicity and performance:
- React Hook Form for easy form management
- Shadcn/UI components for form fields (Input, Textarea, Button)
- Simple API Route (
/api/contact) to handle server-side submissions
The form collects the following information:
- First Name
- Last Name
- Email Address
- Phone Number (optional)
- Message Content
Setting Up Slack Incoming Webhook
To forward contact form messages to Slack, we took the following steps:
- Go to Slack App Management → Create a new App.
- Add Incoming Webhooks feature.
- Create a new Webhook URL and select the desired channel (e.g., #contact-forms).
- Copy the webhook URL — it will be used in the API handler to send messages to Slack.
Building the API Route for Form Submission
Inside Next.js, we created a simple API route /api/contact:
import { sendMessageToSlack } from "@/lib/sendMessageToSlack";
import { ContactType } from "@/lib/types/contact.type";
import { NextResponse } from "next/server";

export async function POST(req: Request) {
  try {
    const data = await req.json(); // Parse JSON request body

    if (!data) {
      return NextResponse.json({ error: "No data provided" }, { status: 400 });
    }

    const payload = buildMessage(data);

    await sendMessageToSlack(JSON.stringify(payload));

    const id = JSON.stringify(data).length;

    return NextResponse.json({ id }, { status: 200 });
  } catch (error: unknown) {
    console.error(error);
    return NextResponse.json(
      { error: "Internal Server Error" },
      { status: 500 },
    );
  }
}
Building the Message Payload for Slack
We defined a simple helper function buildMessage to format incoming form data into a Slack-friendly structure. This ensures that every form submission appears in Slack in a clean, readable format.
import { ContactType } from "@/lib/types/contact.type";

function buildMessage(data: ContactType) {
  return {
    blocks: [
      {
        type: "header",
        text: {
          type: "plain_text",
          text: `New Contact Message from ${data.firstname} ${data.lastname}`,
        },
      },
      {
        type: "section",
        fields: [
          {
            type: "mrkdwn",
            text: `*First Name:*\n${data.firstname}`,
          },
          {
            type: "mrkdwn",
            text: `*Last Name:*\n${data.lastname}`,
          },
          {
            type: "mrkdwn",
            text: `*Email:*\n${data.email}`,
          },
          {
            type: "mrkdwn",
            text: `*Phone:*\n${data.phone}`,
          },
        ],
      },
      {
        type: "divider",
      },
      {
        type: "section",
        text: {
          type: "mrkdwn",
          text: `*Message:*\n${data.message}`,
        },
      },
    ],
  };
}
Sending the Payload to Slack
The sendMessageToSlack function posts the formatted message to the Slack Webhook URL.
export async function sendMessageToSlack(body: string): Promise<boolean> {
  const webhookURL = process.env.SLACK_WEBHOOK_URL;

  if (!webhookURL) {
    console.error("SLACK_WEBHOOK_URL is not defined");
    return false;
  }

  try {
    const response = await fetch(webhookURL, {
      method: "POST",
      headers: {
        "Content-Type": "application/json",
      },
      body,
    });

    return response.ok;
  } catch (error) {
    console.error("Error sending message to Slack:", error);
    return false;
  }
}
By modularizing the code in this way, we ensured our API routes remained clean, maintainable, and easy to test.
Challenges and Lessons Learned
- Form Validation: We performed validation both client-side and server-side to ensure only complete data is submitted.
- Webhook Security: The Slack Webhook URL is securely stored in environment variables (.env) to prevent accidental exposure in Git.
- Robust Error Handling: Comprehensive error catching ensures users receive clear feedback, even if the Slack integration encounters an issue.
- Scalability: The modular structure allows easy future expansions, such as logging contact submissions to a database in addition to Slack.
Final Thoughts
By connecting our Contact Page directly to Slack, we made user communication instant, reliable, and lightweight — avoiding the overhead of traditional email services.
This setup fits our agile development philosophy perfectly:
- It’s simple
- It’s fast
- It’s easy to maintain
- And it's scalable for future needs like database logging or CRM integration
Our team can now instantly react to user inquiries without relying on traditional email systems, which greatly improves our responsiveness.
Contact Page Preview
Here's a preview of our Contact Page, where visitors can quickly get in touch with our team:
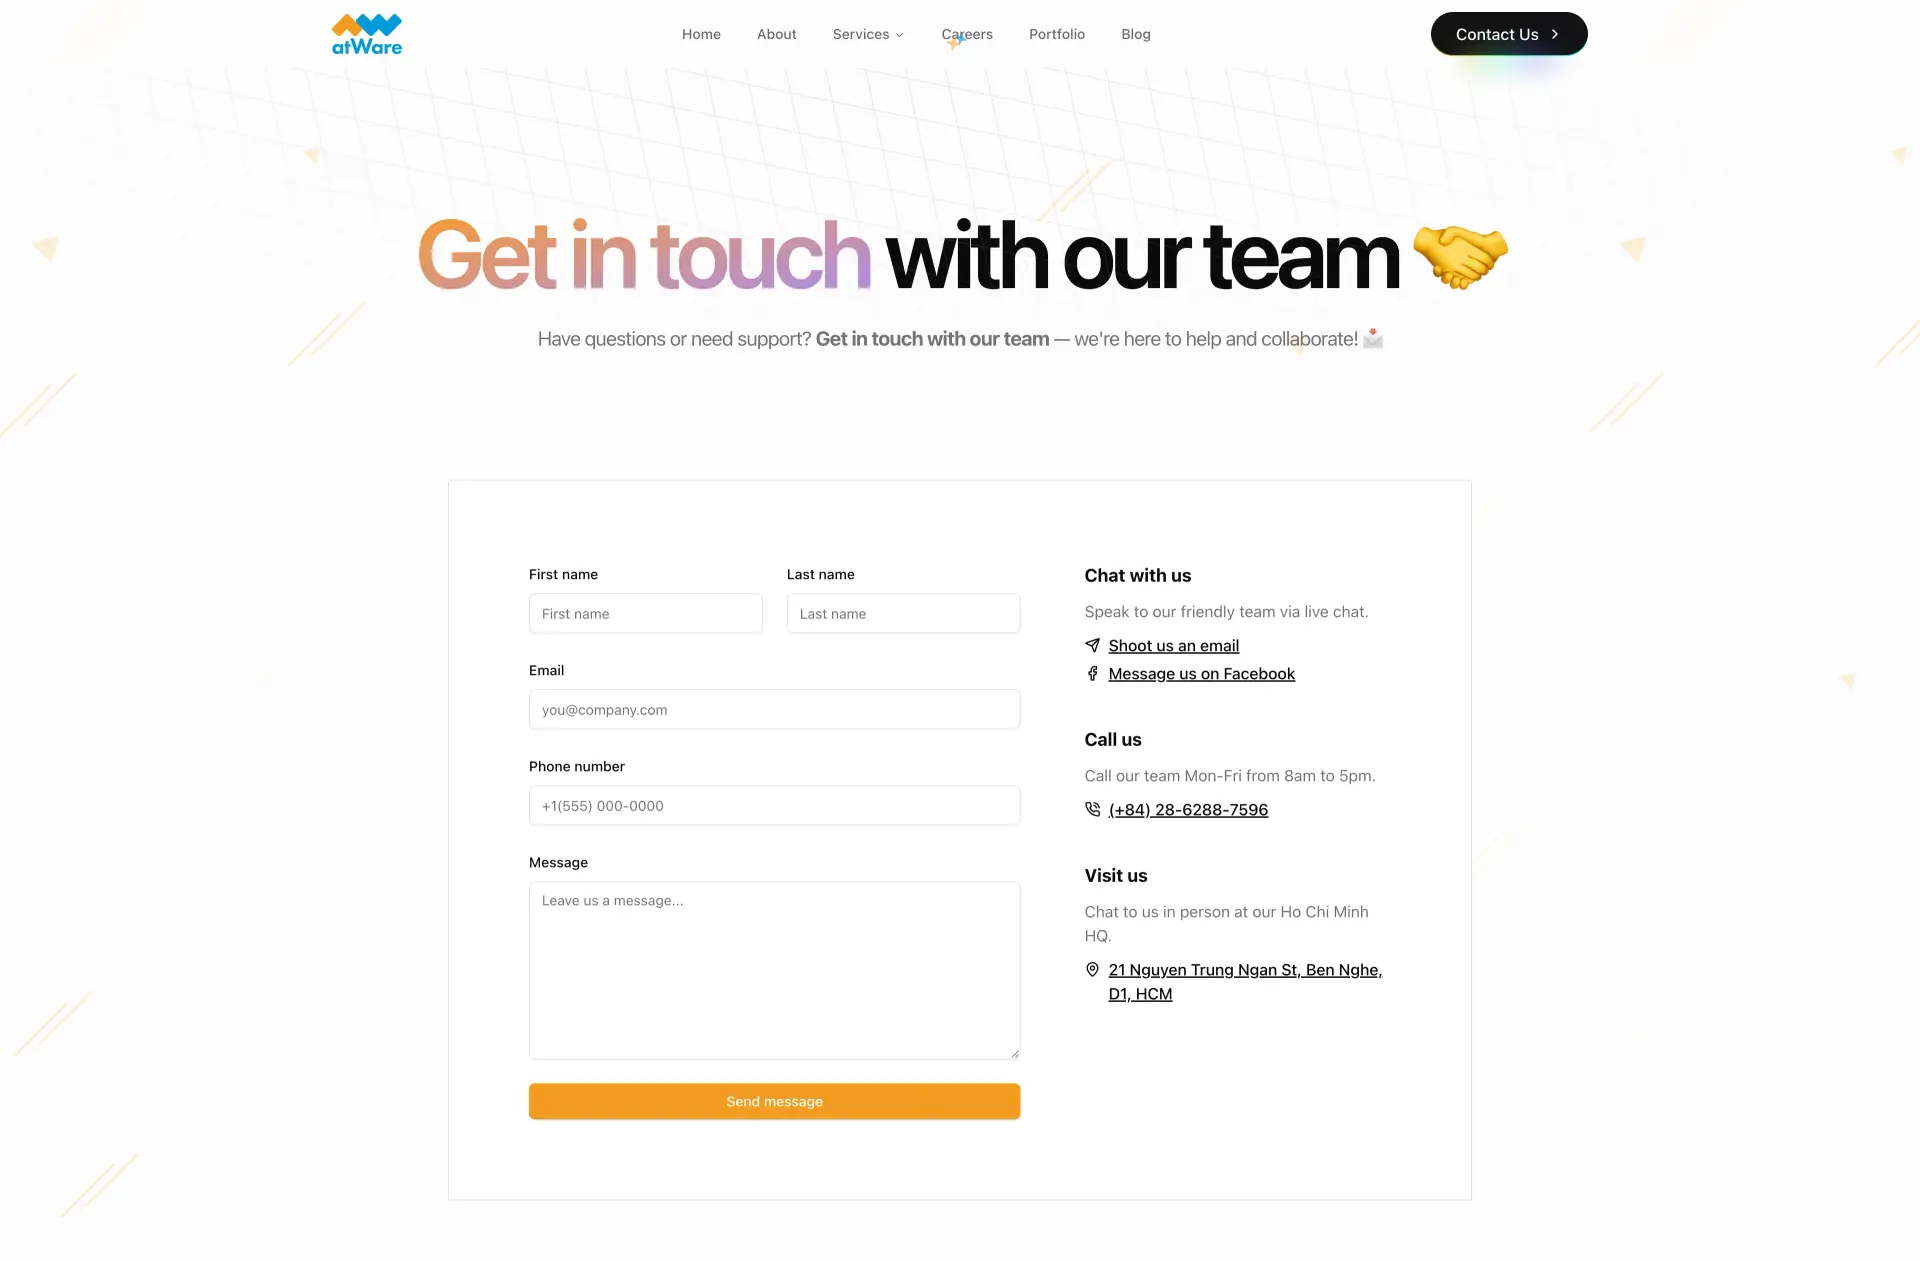
If you'd like to reach out to us, feel free to visit our live Contact Page: 👉 Get in Touch with atWare Vietnam
Now, you can dive into Day 5: Creating a Dynamic Blog with MDX and Python Crawlers!
📚 Explore all posts from the 7 Days Website Revamp series!