Using Mapbox with React #2: Adding Markers, Popups...

Introduction
Welcome back to part two of our Mapbox with React tutorial series! In the previous installment, we delved into initializing the Mapbox library within a React application. Now, we'll take it a step further by adding dynamic markers to our map, making it more interactive and informative.
Adding Markers
Markers are a fundamental component of interactive maps, allowing users to visually identify specific locations or points of interest. With Mapbox, adding markers to your map is a breeze, especially when integrated with React.
Setting Up
Assuming you've already set up your React application and initialized the Mapbox library (if not, check out part one of our tutorial), let's dive straight into adding markers.
Creating Dynamic Markers
In your React component where you've initialized the map (in our case MapboxMap.tsx), we'll enhance it to include dynamic markers. Open MapboxMap.tsx and let's modify the code:
useEffect(() => {
    if (mapContainerRef.current) {
      const map = new mapboxgl.Map({
        container: mapContainerRef.current,
        style: "mapbox://styles/mapbox/streets-v11",
        center: [-74.006, 40.7128],
        zoom: 7,
      });

      // Add a marker for each point
      const points = [
        { coordinates: { lng: -74.5, lat: 40 }, description: "Point A" },
        { coordinates: { lng: -74.6, lat: 40.1 }, description: "Point B" },
        { coordinates: { lng: -74.4, lat: 39.9 }, description: "Point C" },
      ];

      points.forEach((point) => {
        new mapboxgl.Marker().setLngLat(point.coordinates).addTo(map);
      });

      // Cleanup function to remove the map instance on component unmount
      return () => {
        map.remove();
      };
    }
  }, []);
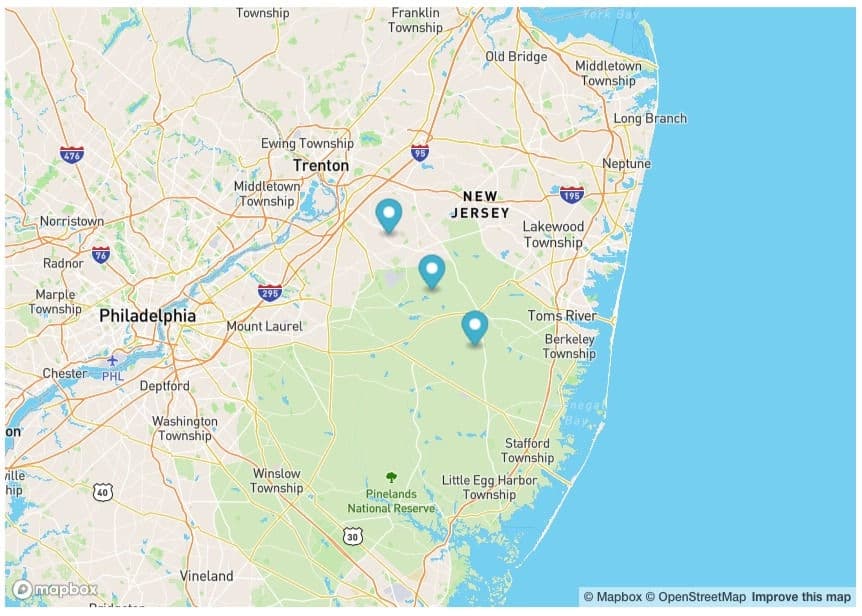
Let's see what we got

Of course, we can also add the Popup here for each point if we like.
Modify the new Marker function like this
points.forEach((point) => {
        const popup = new mapboxgl
			.Popup()
			.setHTML(`<h3>${point.description}</h3>`);
        new mapboxgl.Marker()
			.setLngLat(point.coordinates)
			.setPopup(popup)
			.addTo(map);
      });
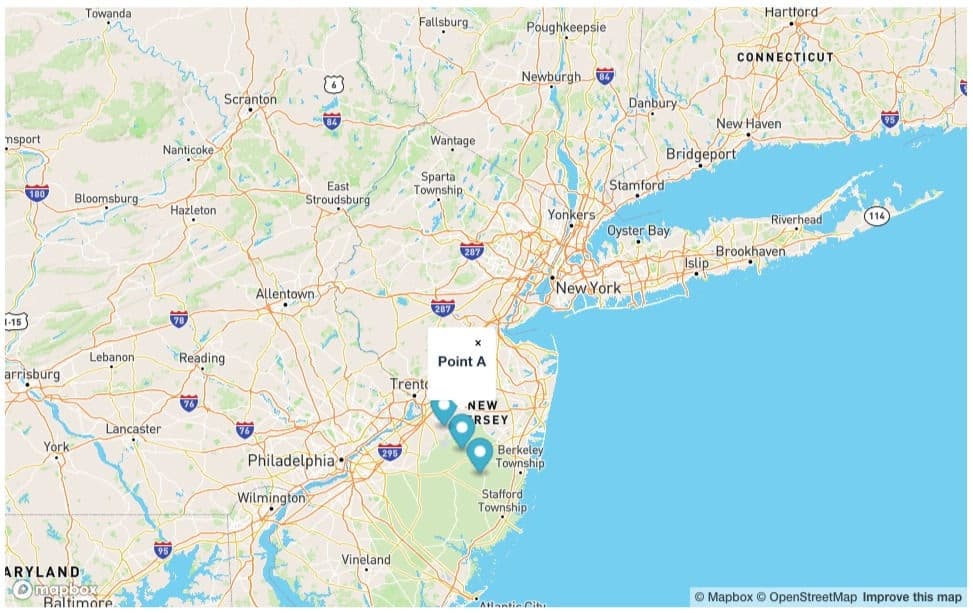
Then, we will got the following result:

Making it a bit more "React"
The code currently functions correctly, but in my projects, I typically add markers in a more "React"-ive manner. The concept revolves around the dynamic nature of the points variable, which often originates from the parent component.
In such cases, I commonly employ the useEffect hook to rely on the point props. This useEffect is responsible for dynamically creating new markers.
Moreover, to ensure that our MapboxMap component remains reactive, it's essential to implement cleanup procedures for markers when the component is re-rendered.
const [markers, setMarkers] = useState<mapboxgl.Marker[]>([]);

useEffect(() => {
    setMarkers(
      props.points.map((point) => {
        const popup = new mapboxgl.Popup().setHTML(
          `<h3>${point.description}</h3>`,
        );
        return new mapboxgl.Marker()
          .setLngLat(point.coordinates)
          .setPopup(popup);
      }),
    );
  }, [props.points]);

  useEffect(() => {
    if (map.current) {
      markers.forEach((marker) => marker.addTo(map.current!));
    }

    return () =>
      markers.forEach((marker) => {
        marker.remove();
      });
  }, [markers]);
Customization and Interactivity
You can further customize popups by adding images, links, or any other HTML content. Additionally, you can listen for user interactions, such as clicks on markers, to trigger specific actions or display additional information.
Conclusion
By incorporating interactive popups into our React Mapbox application, we enhance the user experience and provide valuable context to the markers on our map. Whether it's highlighting key points of interest, providing details about specific locations, or presenting data dynamically, popups play a crucial role in creating immersive and informative maps. Experiment with different popup styles, content, and interactions to create maps that captivate and engage your audience. Happy mapping!
The source code of this guide can be found here: here